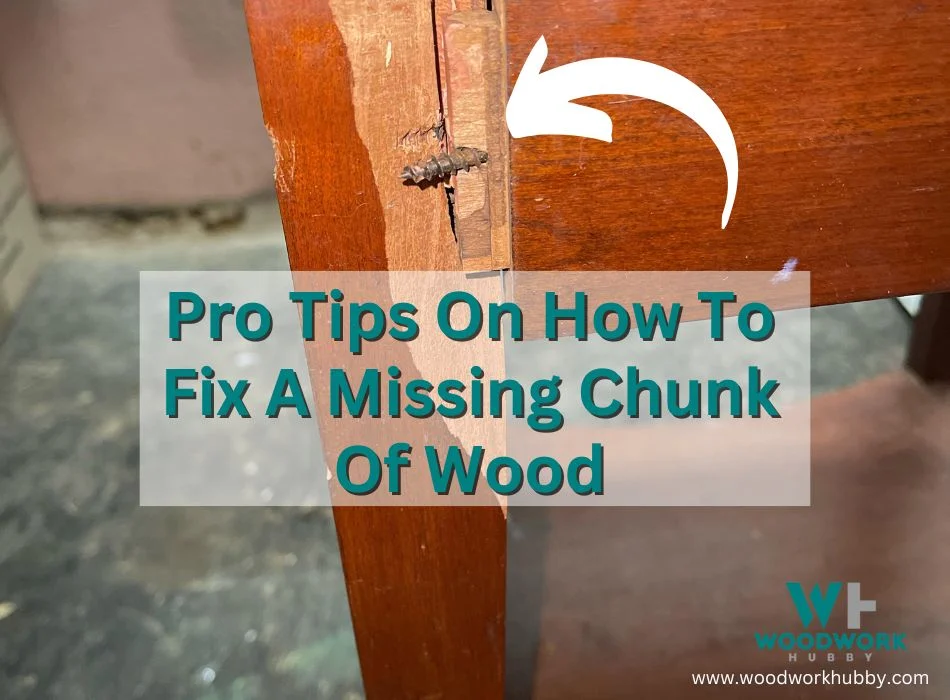
Missing wood chunks on furniture or other wooden items can greatly affect their appearance and functionality. I have had this happen several times so I thought I would put together this guide with my pro tips on how to fix a missing chunk of wood.
To fix a missing chunk of wood, glue on another piece of wood of the same species and color or use wood filler if it’s not too visible. The first method requires a little more skill but does produce a better result.
I will show you how to perform both methods within this article so you can fix the problem right away.
What Causes Missing Chunks of Wood?
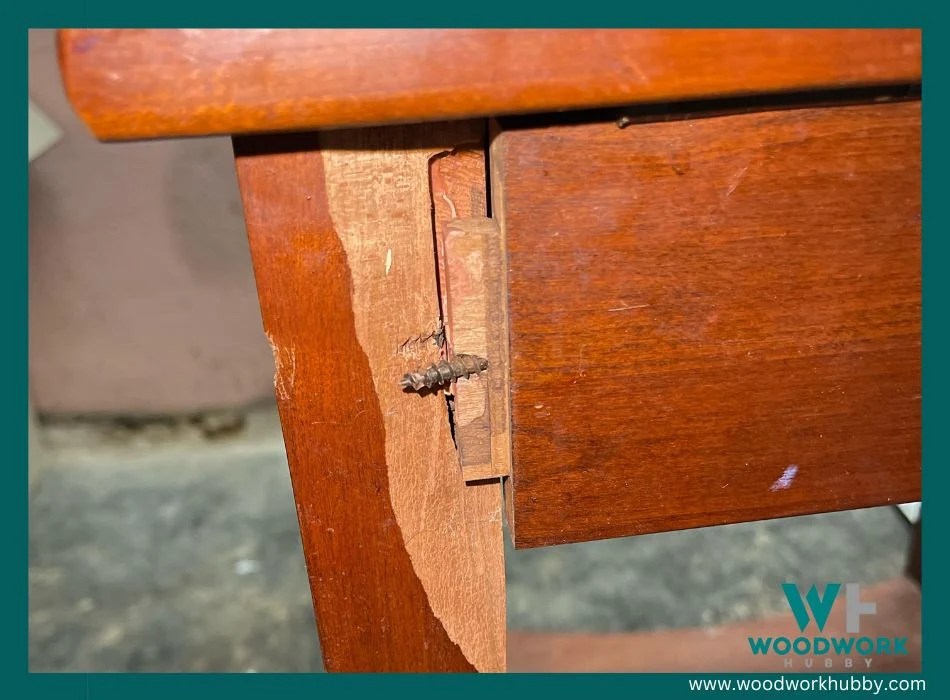
Chewing pets are a common culprit when it comes to missing chunks of wood. I discovered this reality firsthand after my dog decided the base of my bed frame looked like a tempting chew toy.
But, our furry friends aren’t the only cause of this damage. General wear and tear can lead to gradually eroding chips in your wooden fixtures over time. Additionally, an unintentional knock on heavy furniture might result in gouges or dents.
Water damage is another major reason behind missing chunks of wood. Moisture seeps into exposed surfaces, causing swelling and distortion that weakens structural integrity over time; eventually pieces loosen and break off.
Termites and other pests also feast on bare wood surfaces, carving out hollow spaces that weaken structures until bits fall away leaving visible gaps. Lastly, improper handling during transportation or while shifting can stress sections leading to fractures or outright breaks from impact trauma.
The 2 Proven Ways To Fix Missing Chunks
I have found the 2 following ways the easiest and neatest ways to fix missing chunks of wood:
- Glue on an offcut of wood
- Fill the patch with wood filler
Glue On An Offcut Of Wood
Gluing an offcut of wood is a trusted method to restore your furniture’s authenticity when dealing with missing chunks. To start, you’ll need your selected offcut that matches the existing piece in terms of grain pattern and color.
I will explain how to perform this method a little further in the article.
Fill The Patch With Wood Filler
Using Bondo wood filler, you’ll be able to restore the piece of furniture seamlessly. It’s essential to work swiftly as our good friend Bondo dries quickly! If you’re working in larger sections, consider breaking them down into smaller areas for better manageability and results while using Bondo wood filler.
Tools and Materials Needed for Repairing Missing Wood Chunks
To fix a missing chunk of wood, you will need the following tools and materials:
Bondo Wood Filler
I highly recommend using Bondo Wood Filler for repairing missing chunks of wood. Originally created for auto body repair, Bondo wood filler is a versatile and reliable option for fixing damaged wood furniture.
It dries quickly and sands easily, making it easy to shape and blend seamlessly with the rest of the wood. When using Bondo wood filler, be sure to mix it precisely with a hardener before applying it to the damaged area.
Bondo Wood Filler
Highly recommended for repairing missing chunks of wood.
- TWO-PART FORMULA chemically bonds with surface to adhere permanently
- QUICK, DURABLE REPAIRS to damaged and rotted wood
- USE ON MOST WOOD-BASED interior or exterior surfaces
- Permanent, non-shrinking repairs
Wood Glue
I always keep wood glue on hand for quick and reliable repairs. It’s a must-have tool when fixing a missing chunk of wood.
I highly recommend using a strong wood glue like Titebond or Gorilla glue.
Titebond wood glue.
Utility Knife
A utility knife is an essential tool for repairing a missing chunk of wood. It allows you to carefully trim off any excess wood after gluing on a new block or applying wood filler.
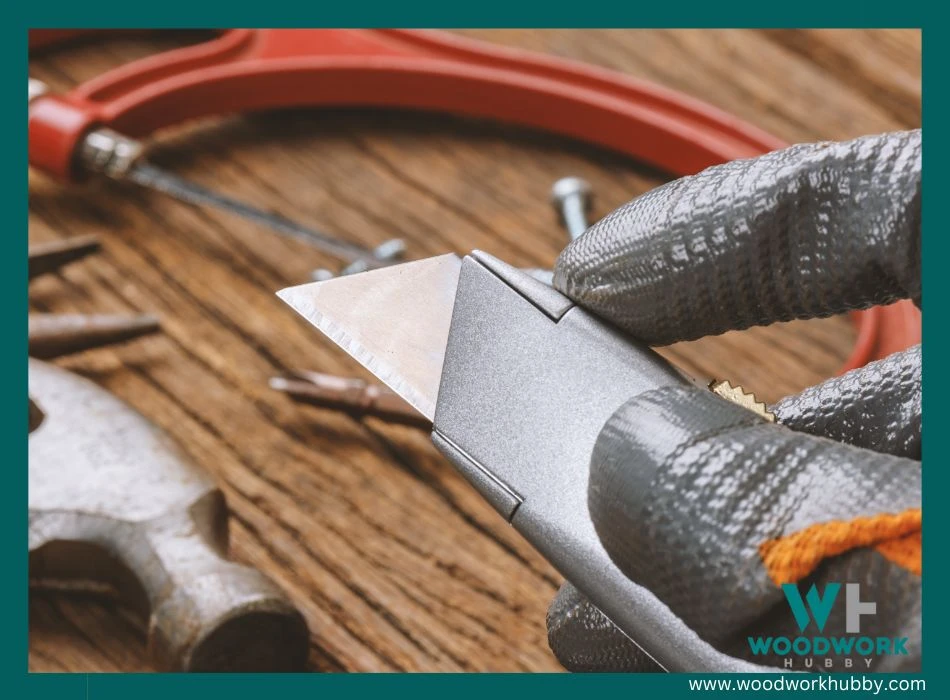
With its sharp blade, the utility knife ensures precision and clean cuts, helping you achieve a seamless repair.
Sandpaper
Sandpaper is a crucial tool for fixing missing wood chunks in furniture repair. It is used to shape and smooth the excess overhang of wood or sand back the Bondo wood filler.
This helps achieve a professional-looking finish by feathering the edges of the Bondo filler, creating a seamless blend with the rest of the wood. Sandpaper also plays a role in preparing the repaired area for painting or staining by cleaning off any dust and debris.
With sandpaper, you can achieve a smooth and flawless repair job that will make your furniture look as good as new.
Artist’s Acrylic Colors
Artist’s Acrylic Colors are a versatile and effective option that can be mixed with Bondo wood filler to match the wood grain color.
This is an optional step and that is why I only suggest using this on places that are not seen.
Lacquer
I always finish my wood repairs with a layer of lacquer. Lacquer is a protective coating that adds shine and durability to the repaired area. It helps to seal the wood and prevent any further damage, ensuring that your repair job lasts for years to come.
Step-by-Step Guide to Fixing a Missing Chunk of Wood
To fix a missing chunk of wood, there are two methods you can choose from: gluing on a block or filling the patch with wood filler.
I will show you how to glue on a block as I believe this is a much better option, especially for furniture.
Gluing On a Block
First, make sure the area is perfectly flat.
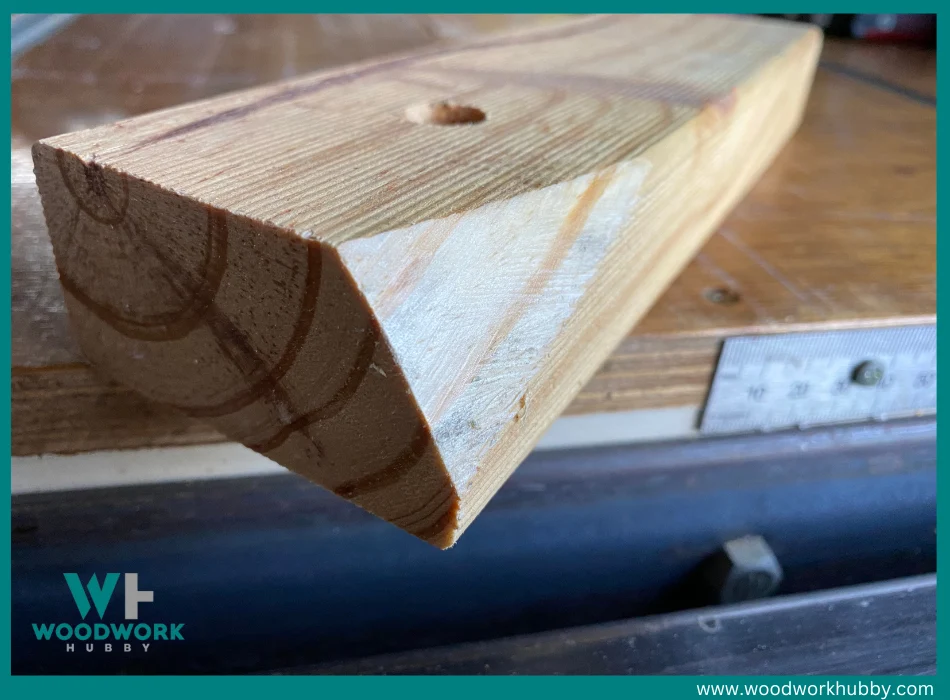
Remember, when gluing on a new block of wood, it’s essential to ensure that both surfaces are clean and free from debris for optimal adhesion.
I usually grab a hand plane or sanding disc and make the surface flat ready to accept the block of wood.
Cut A Block Of Wood To Use
You will need to prepare a block of wood that you want to use to glue on. Make sure it is of the same variety and cut from the same board if possible. This gives the best chance of matching the color to the original piece.
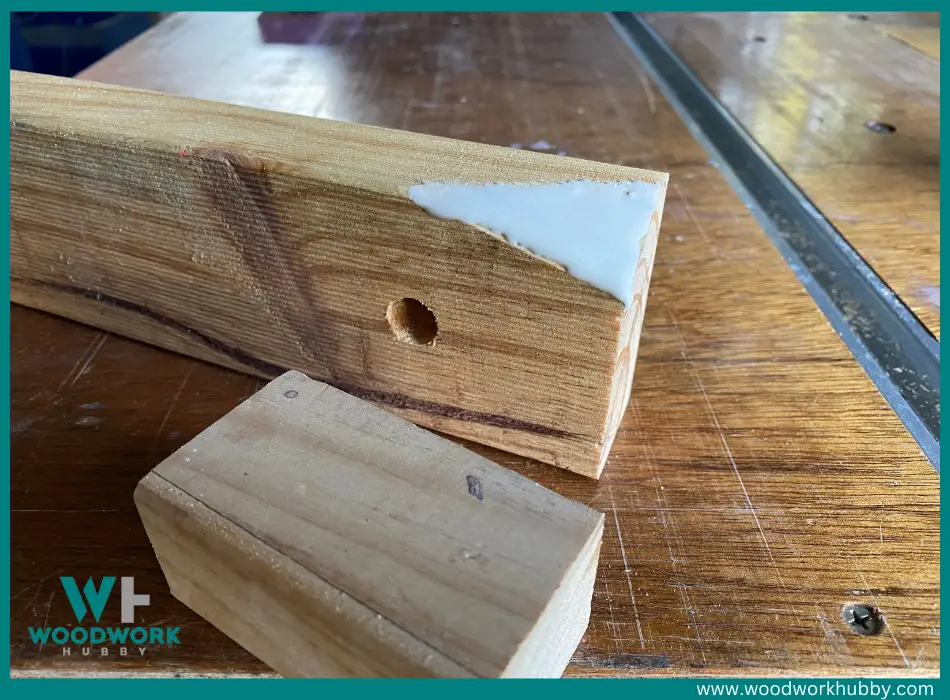
Apply Wood Glue
Next, you will need to apply a generous amount of wood glue. Don’t skimp here and use one that is high quality. I use Titebond as shown above. Apply glue to both surfaces.
Place Clamps on The New Block
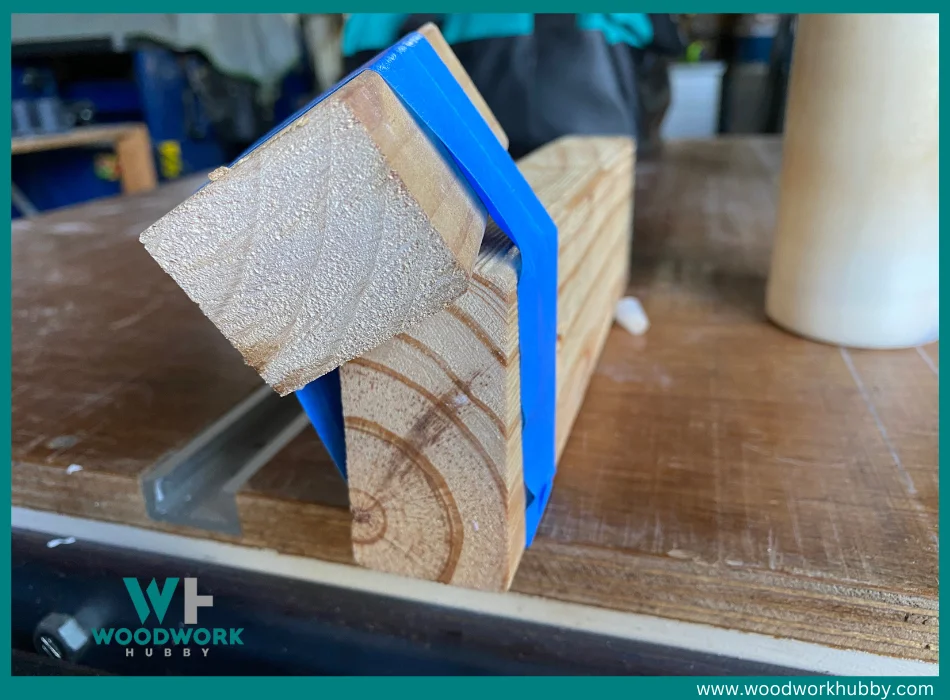
It is always good to use clamps to hold onto the new piece of wood until the glue has dried. This can sometimes be tricky because of the place or angle of the missing chunk.
For this piece, I had to use masking tape to secure it. The tape is perfectly fine to hold on to the new block.
Wait for The Glue To Dry
You will need to give the glue at least 24 hours to completely dry before removing the tape or your clamps.
See my full article on wood glue drying times you can use for reference for the type of wood glue you are using.
Trim off Excess Wood
To complete the repair of a missing chunk of wood, it’s important to trim off any excess wood that may stick out or be uneven. I generally use a handsaw, jigsaw, or bandsaw here.
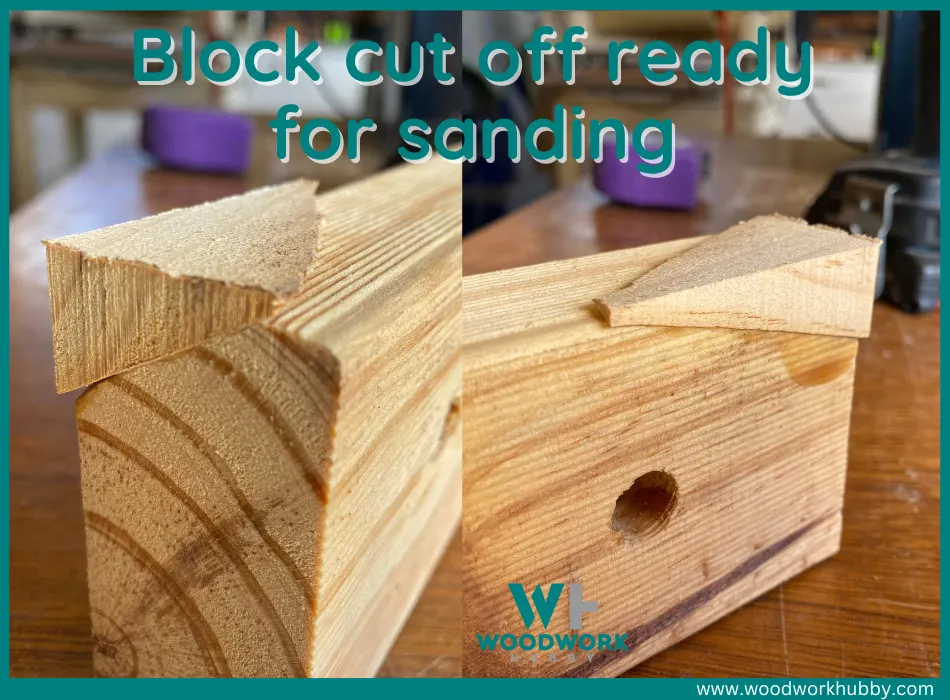
By trimming off the excess wood, you ensure that the repaired section blends seamlessly with the rest of the piece.
Sand the Area
I always make sure to sand the area after gluing on a new wood block for a seamless repair. Sanding helps smooth out any rough edges and blends the repaired section with the rest of the wood.
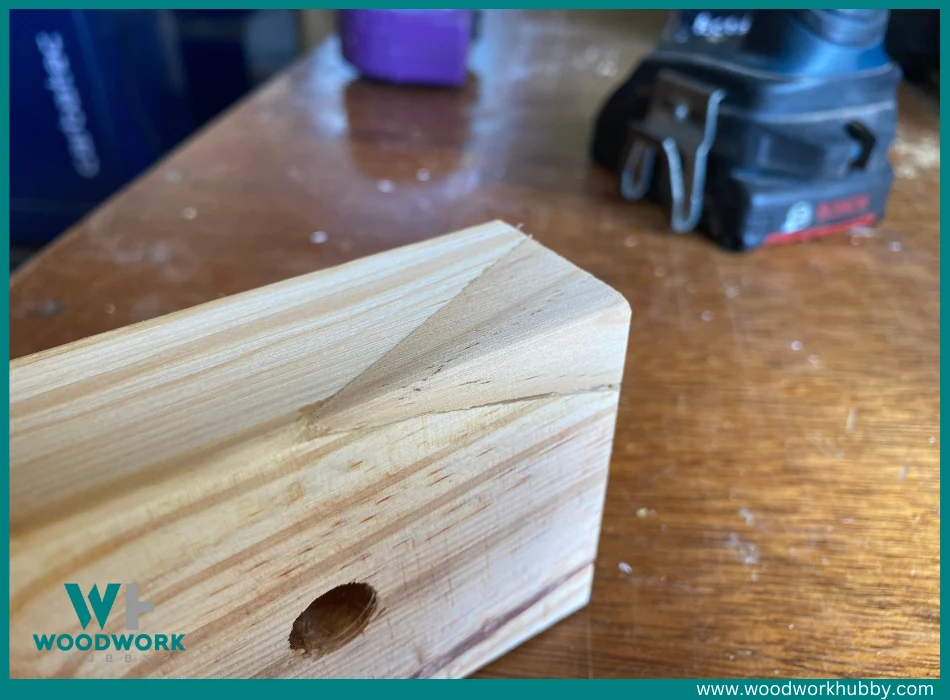
It’s important to use sandpaper with the appropriate grit, starting with coarser grits and gradually moving to finer ones for a polished finish. By sanding the area, you create a surface that is ready for painting or applying a fresh coat of finish, giving your repaired piece a professional look.
Apply New Finish
Once the missing chunk of wood has been repaired using Bondo wood filler, it’s time to apply a new finish. This final step will not only protect the repaired area but also help blend it seamlessly with the rest of the wood.
Start by sanding the entire surface, including the patched area, to create a smooth and even base for your finish. Next, choose your desired finish, whether it’s paint or stain, and apply it evenly across the entire piece of furniture.
Allow ample drying time before applying multiple coats if necessary. Finally, once your finish is fully dry, admire your handiwork as you see how well the repaired wood blends in with its surroundings.
Filling With Wood Filler
To fix a missing chunk of wood, another effective method is to fill the patch with wood filler. Bondo wood filler is recommended for this job because it dries quickly and can be easily shaped and blended with the wood.
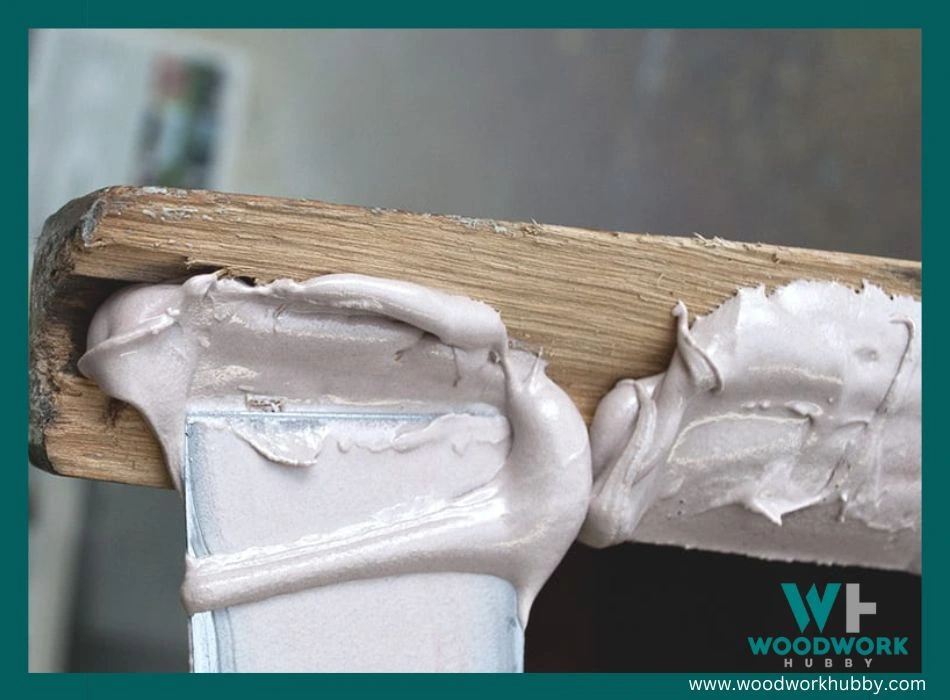
To start, prepare the damaged area by cleaning it thoroughly. Then, mix the Bondo wood filler with a catalyst according to the instructions provided. Apply the mixture to the damaged area and shape it as desired using a putty knife or similar tool.
Once the filler has hardened, use sandpaper to smooth out any rough edges or imperfections. It’s important to choose the correct grit sandpaper for this step in order to achieve a smooth finish.
After sanding, you can proceed with painting or lacquering the repaired area to match the existing wood tone. Remember to choose an appropriate paint color that closely matches your furniture or surface.
By filling missing chunks of wood with wood filler, you can restore your wooden items and make them look as good as new again. Keep in mind that Bondo wood filler should be mixed precisely using small amounts at a time and applied before it hardens completely for best results.
Preparing the damaged area
To begin repairing the missing chunk of wood, it’s important to properly prepare the damaged area. This involves removing any loose or splintered wood and cleaning the area thoroughly.
Once the damaged area is clean, you’re ready to proceed with fixing the missing chunk using either gluing on an offcut of wood or filling the patch with wood filler.
Mixing and applying the bondo wood filler
To repair a missing chunk of wood, Bondo Wood Filler is an excellent choice. It provides a hard finish and is easy to work with. When using Bondo Wood Filler, it’s important to mix it precisely with a hardener and work quickly because it dries fast.
Make sure you have all the necessary materials ready, including Bondo Wood Filler, a spatula or putty knife, sandpaper, cleaner or degreaser, tack cloth, gloves, and a mask for protection.
By mixing small amounts at a time and working in sections if needed, you’ll be able to apply the filler smoothly without spreading it too thin. Once applied, Bondo Wood Filler can easily be shaped and blended with the surrounding wood by sanding it down.
Shaping the filler and removing excess
To shape the filler and remove any excess, I recommend using sandpaper. Bondo wood filler is easy to work with because it sands smoothly and blends seamlessly with the wood. Start by sanding the filled patch to create a smooth surface.
Then, use sandpaper to shape and feather the edges of the filler, ensuring a seamless blend with the rest of the wood. This step is crucial for achieving a professional-looking finish.
Finally, remember to remove any excess filler before shaping to achieve the desired result.
Sanding the area for a smooth finish
Sanding the area for a smooth finish is a crucial step in fixing a missing chunk of wood using Bondo wood filler. After applying and shaping the Bondo, sanding helps to create a seamless blend with the rest of the wood.
It also allows for feathering the edges and removing any imperfections, resulting in a polished and professional-looking repair job. Once you have sanded the area, make sure to clean up any dust using a tack cloth before moving on to painting or staining.
Sanding ensures that your repaired wood surface is ready for its final finish, whether you choose to paint it or stain it to match the surrounding wood.
Painting and lacquering the repaired area
After applying and shaping the Bondo wood filler to repair the missing chunk of wood, the next step is painting and lacquering the repaired area. This final touch helps seamlessly blend the repaired wood with the rest of the piece.
While specific steps for this process are not mentioned, painting and lacquering adds a protective finish that enhances the overall appearance of your furniture or project.
Tips for Successful Wood Chunk Repair
Mix the wood filler and catalyst thoroughly to ensure a strong bond between the filler and the wood. Time your work carefully, as the filler tends to harden quickly once mixed, so be prepared to apply it immediately.
Use sandpaper with the correct grit for each stage of repair, starting with coarse grits for shaping and smoothing, and then transitioning to finer grits for a polished finish. Choose paint colors that closely match the existing wood to achieve a seamless repair.
Properly mixing the wood filler and catalyst
Mixing the wood filler and catalyst is a crucial step in using Bondo wood filler for repairing missing chunks of wood. To ensure a successful repair, it’s important to mix the two components properly.
Bondo wood filler requires precise mixing with a hardener, as it dries quickly and sets fast. Remember to only mix small amounts at a time to prevent wastage and work efficiently before the filler hardens.
This will ensure that the mixture is well-blended and ready for application onto the damaged area of the wood furniture.
Timing your work before the filler hardens
To successfully fix a missing chunk of wood using Bondo wood filler, it’s crucial to time your work before the filler hardens. Bondo wood filler sets quickly, so you need to work fast and efficiently.
Once you mix and apply the filler, shape and feather it before it fully hardens. This will ensure that the repaired area seamlessly blends with the rest of the wood, creating a smooth and professional-looking finish.
Remember, timing is everything when using Bondo wood filler for repairing missing chunks of wood.
Using the correct sandpaper grits
To achieve a smooth and professional-looking finish when repairing a missing chunk of wood, it is crucial to use the correct sandpaper grits. Sandpaper with an 80 grit should be used initially to shape and smooth the Bondo wood filler after it has dried.
This coarse grit helps to feather the edges of the filler, ensuring that it seamlessly blends with the surrounding wood. Once the initial shaping is done, switch to a finer 180-grit sandpaper for further smoothing and refining the surface.
By using these appropriate sandpaper grits, you can achieve optimal results and restore your wood piece to its former glory.
Choosing the right paint color to match the existing wood
I carefully select the paint color to ensure it matches the existing wood seamlessly. The goal is to create a cohesive and polished look, blending in the repaired area with the surrounding wood.
This involves analyzing the undertones, grain patterns, and finish of the existing wood before choosing a matching paint color that complements it perfectly. By taking this step, I can achieve a professional and flawless repair that is virtually undetectable.
Conclusion – How To Fix A Missing Chunk Of Wood
In conclusion, fixing a missing chunk of wood in furniture or other wooden items can be easily done with the right tools and techniques. Whether you choose to glue on a block or fill the patch with wood filler, following step-by-step instructions and using the recommended materials will ensure a successful repair.
With these pro tips in mind, you’ll be able to restore your wooden pieces back to their original beauty in no time. Don’t let a missing chunk of wood ruin the aesthetics or functionality of your favorite items – get started on repairing them today!
FAQs
1. How can I fix a missing chunk of wood?
To fix a missing chunk of wood, you will need to first clean the area and remove any debris. Then, apply wood filler or epoxy resin to fill in the missing section. Once it has dried, sand the area smooth and apply paint or stain as needed for a seamless repair.
2. What tools do I need to fix a missing chunk of wood?
To fix a missing chunk of wood, you may need tools such as a chisel or utility knife to clean out the damaged area, sandpaper or an electric sander for smoothing the repaired surface, and appropriate brushes or applicators for applying wood filler, epoxy resin, paint, or stain.
3. Can I use any type of filler to repair a missing chunk of wood?
It is important to choose an appropriate filler for repairing a missing chunk of wood. Wood fillers specifically designed for repairs are recommended as they are formulated to bond well with wood surfaces and provide strength and durability once dry.
4. Is fixing a missing chunk of wood something I can do myself?
Fixing a missing chunk of wood can be done by individuals with some DIY experience and basic woodworking skills. However, more complex repairs may require professional assistance from carpenters or contractors who specialize in woodworking repairs.

