Finishing nails are sleek and nearly headless. They look great when appropriately fastened to a surface. Their functional utility is undeniable, but the difficulty in driving them is undeniable as well. I recently experienced this when I was fixing plywood back onto a cabinet. The struggle is real!
Finishing nails keep bending because of 1 of 3 causes. Bad hammer face, poor hammering technique or the wood species all can cause a finishing nail to bend. In 9 out of 10 cases, the nails get bent because they aren’t being hammered perpendicularly. But sometimes, it is the hardwood material or something impenetrable under the wood.
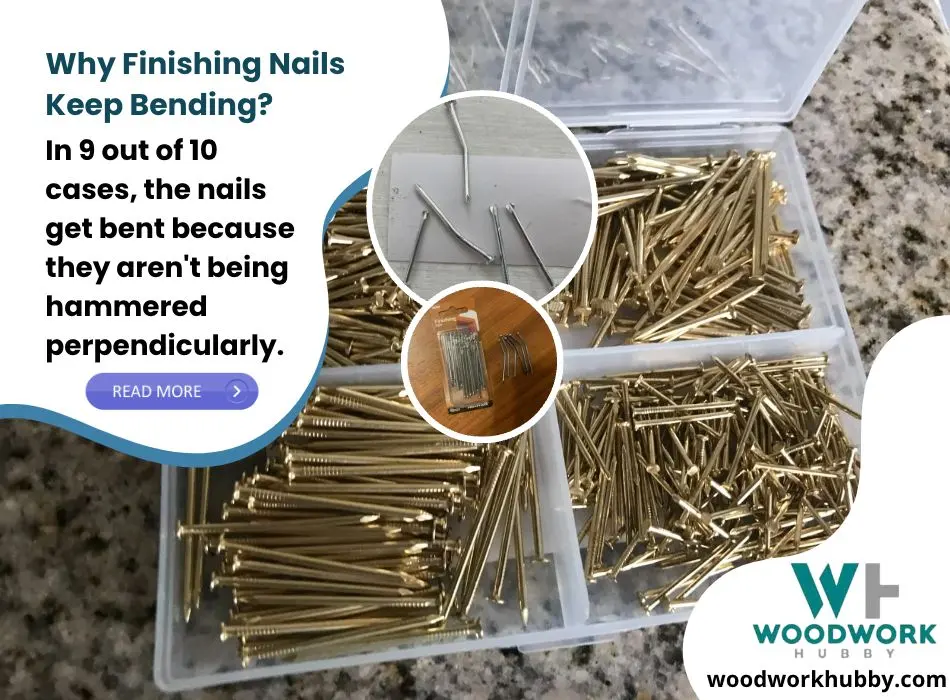
In this article, you will discover everything you need to know to stop nails from bending. The information compiled here draws from my 20 years of experience alongside other authoritative resources. By the end of this post, you will know how you can stop finishing and regular nails from bending, regardless of the method you use to drive said nails. But let’s start by looking at the reasons alongside solutions at a glance.
| Problem | Reason | Solution |
|---|---|---|
| Finishing nail keeps bending in different types of wood | Hammering action is not precise. | Learn more on how to use a hammer properly here or you could cheat and get a straight finish nailer like the NuMax SFN64 Straight Nailer |
| Finishing nail keeps bending in just one type of wood | The nail isn’t compatible with the wood | Use a different nail |
| The nail keeps bending despite using a nail gun | The nail gun has lost air pressure | Get the nail gun repaired or the wood could be extremely hard |
| The nail gets bent occasionally | You aren’t hammering properly | Make sure you follow the best practices of hammering (covered later). Learn how here. |
How Do I Stop My Nails From Bending?
You can stop your nails from bending by reducing the imprecise hammer action on the nails or finding softer wood to hammer them into.
There are three causes of a bent nail: bad hammer, poor hammering action, or dense wood. I will cover each of these below.
Nail thickness matters more than nail material when you’re trying to lodge a nail into a dense chunk of wood.
Wood Species
All species of wood vary in hardness and density. I have found that some hardwoods will simply not accept a nail no matter its thickness, without using a pilot hole. (Click this link to see my reasons why pilot holes are important and which size you should use)
Just check what wood you are trying to nail into. I have found that sometimes finishing nails will continually bend no matter what I do and it’s usually because the wood is just too hard.
Dirty Hammer Face
This is an old carpenter’s trick that not many people know of, but it is extremely important to nailing successfully.
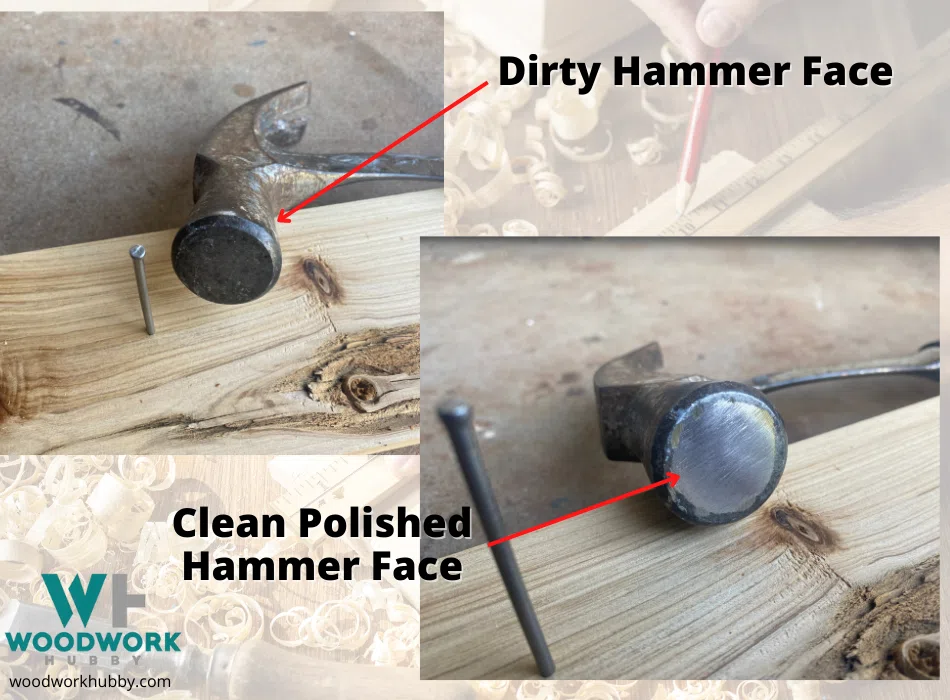
Check the face of your hammer. If it is dirty, too rounded, or has defects in it, you will always be bending the finishing nails. The photo shows how a hammer face should look.
Poor Hammering Technique
This is the number 1 reason why nails bend. A bad technique or an inexperienced user on a hammer is what I have found to be the main cause of bending nails.
I did this experiment by accident a few years back. I was helping my neighbor renovate his bathroom. We had to apply new wall sheets and nail these into the hardwood studs. My neighbor is not experienced in nailing. He was bending every third or fourth nail over. We swapped places as he thought the stud was too hard. I had no trouble.
He even asked to swap hammers and he still continued to bend nails. It was simply his technique was not great.
The video below will help get your technique right.
How to hammer a nail without it bending
There are different ways to prevent each one of these. Starting with wood density, your nail selection should match the lumber you’re trying to nail into. Nail thickness matters more than nail material when you’re trying to lodge a nail into a dense chunk of wood. If the nail is not thick enough to drive through, the force of the hammer will shift at an angle resulting in a very prominent bend.
Material Interference Inside Wood
The second reason for nail bending is material interference. This is very often the main cause as far as finishing nails are concerned. Due to the nature of some projects, the nail is driving through not just one sheet of wood. Let’s suppose a nail is being driven into a cabinet with a cedar board face.
Pro Tip: If the nail bends, don’t try to straighten it.
Remove the nail and use a new one!
If a thick layer of birch plywood is inside, the nail point will stop going further with as much force. That’s when a strong nail hit would bend the nail instead of driving it. It is advisable to avoid using a lot of force when hammering a nail. The higher the speed of the hammer, the more the chances of bending. This brings us to the third fix.
Reducing the speed at which you hit a nail can help avoid bending in instances when there are different layers that are being nailed together. In cases when the nail bends because the hammer hits it imprecisely, the slow pace of hammering will only make the process of bending slower. It will not keep the nail from bending.
The final fix is to use a nailing tool that isn’t a hammer. A finish nailer tool is a very precise nail driving tool that allows you to shoot a nail into lumber with exact precision. This precision is missing when you use your fingers to position a nail and a manual hammer to drive it.
None of these solutions are interchangeable, which is why you should know the exact reason behind your nails bending. Once you know why your nails are bending, you can easily see which solution is best for you.
A video showing what you need to do if you bend a nail when hammering it.
Why Do My Nails Keep Bending?
Your nails keep bending because of one of 3 reasons.
- The nail is not compatible with the wood
- There is something else underneath the wood
- The nail isn’t being struck with precision
- The hammer face is dirty
It can be difficult to pinpoint which one of these is the cause for your nail not going straight. That’s why the following table is a must-have for most starting woodworkers. Here are the signs that you can use to figure out why your nails keep bending.
| Nail Bending Cause | Symptom(s) |
|---|---|
| The nail is not compatible with the wood | The nail bends even when you try to drive it through wood scrap from the same project. Thicker nails go through the wood without bending as much |
| There is something else underneath the wood | When you try driving the nail through wood scrap from the same project, the nail goes through easily. Even thick construction nails don’t drive through the project wood |
| You are hammering the nail imprecisely | The nail is a finishing nail. Nine out of ten times, finishing nails are bent because of the imprecision of hammering. You are unable to hammer it straight across different types of wood. |
How Do I Stop My Nails From Bending When Hammering?
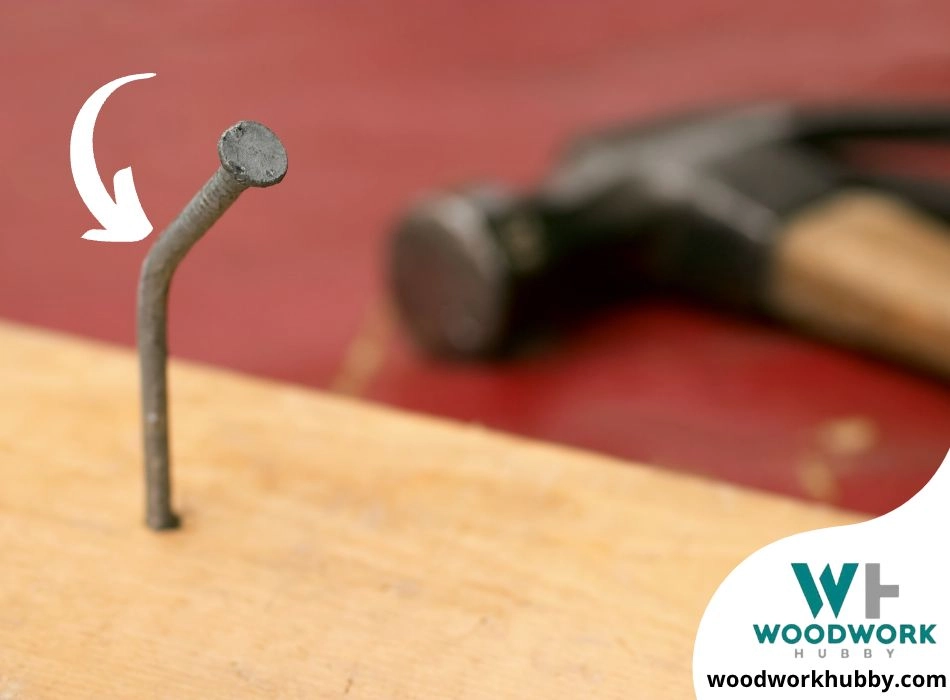
To stop your nails from bending when hammering, you need to be sure of the underlying cause. If the nail head is too small to hit with a hammer, you should use a finish nailer tool to help keep the nail straight and drive it into the wood.
If the nail head is not the issue and you generally find it difficult to hammer a nail into the wood without bending, then you’re probably trying to drive the entire nail through the board without letting the nail shaft anchor into the wood.
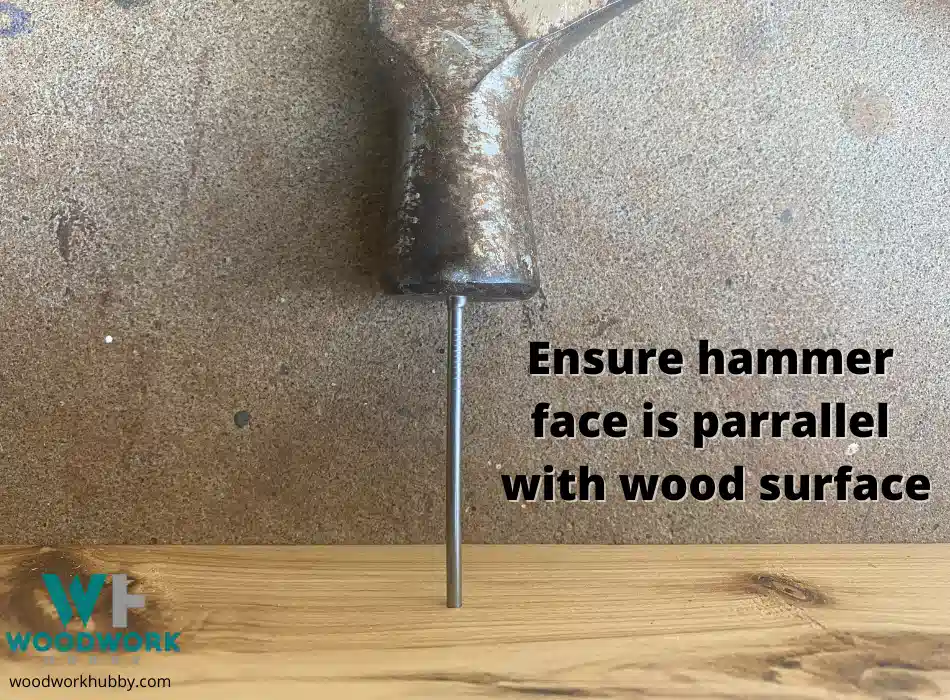
The first step should be to get the nail to get lodged perpendicularly into the wood. And this is done in 2 ways. Firstly, by getting the nail position right and the nail itself upright. And secondly, by hammering perpendicular to the surface until the nail is anchored into the wood.
The exact steps to keep your nail from bending when working with a hammer are as follows:
- Step 1 – Hold the nail by its tip and place it exactly where it should be driven – This will help the nail not just drive straight but will reduce the odds of having to remove it and re-nail the board.
- Step 2 – Adjust the nail head so that the nail is perpendicular to the board – The nail head’s position is almost as important as the hammer’s position. Both the head and the hammer must drive straight into the wood, not at an angle.
- Step 3 – Place your hammer exactly above the nail head and hammer it slowly – Don’t try to hammer the nail in on the first try. You should start with light and repetitive tapping until you notice some progress.
- Step 4 – Let the tip of the nail drive into the wood – Keep the frequent tapping action going until the nail is lodged far enough into the wood that you do not need to hold it anymore.
- Step 5 – Now start hammering and make sure the hammer goes down straight every time – Once the nail can stand in the board/sheet on its own, you can start hammering with force. But at no point should you hammer at an angle.
Why Is My Nail Gun Bending the Nails?
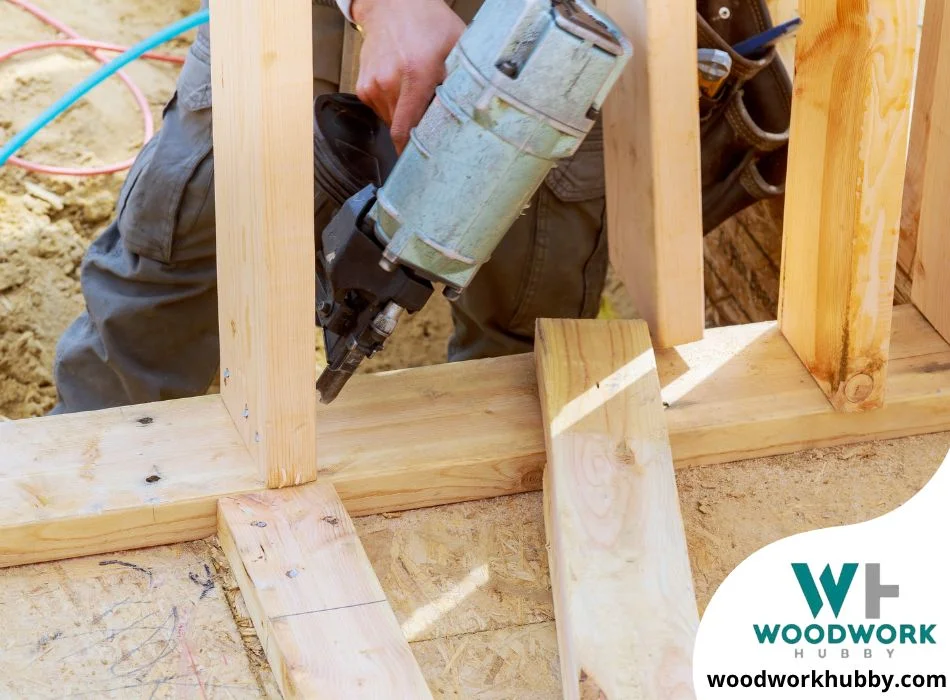
Generally, people offer nail guns as a solution for bent nails since it is so easy to hammer at an angle. I sometimes catch myself hammering at an angle, even though I have been woodworking for over two decades. Nailguns generally work well to eliminate nail bending. But sometimes they too bend nails. This can be particularly frustrating if the nail gun is expensive.
Your nail gun keeps bending nails because it lacks the necessary air pressure, or it is being used on seasoned hardwood like Oak, and the nails aren’t structurally sound enough to drive through it. Getting your nail gun checked and using thicker nails can help.
But the first thing you need to do upon noticing that your nail gun keeps bending nails is to check if the gun is at fault. One way to do this is to simply try using a hammer. If the hammer doesn’t bend the nail on the same lumber, then chances are that the nail gun lacks air pressure. On the other hand, if the hammer is bending nails just as often, you can be sure the problem is in the lack of compatibility between the nail and the wood surface.
If the wood you’re working with isn’t solid hardwood, then you can skip the test altogether. In my experience, if the nail bends and the wood surface isn’t seasoned hardwood, the nailing method or contraption is to blame.
If your nail gun is losing air, you will probably notice this in the form of low drive. The nails that stay straight will also not go all the way through. In that case, you should really get it checked. Whenever my nail guns have lost their oomph, it has been because of air loss through a leak around the trigger.
A video of an air nail gun repair.
How To Drive in Nails With a Hammer?
If the low air pressure in the air gun is causing nails to bend, then you have no choice but to go back to the classic. A hammer will help you manually drive a nail in almost every instance where the nail is sharp enough, and the wood adheres to it. Here are the exact steps you need to follow.
- Make sure the hammerhead is flat – This should be twofold. Firstly, the hammer head should be even. Any curve or dent on the hammer head directly translates to bent nails.
- Make sure the nail is sharp and compatible with the receiving surface – In some instances, the nail needs to be blunt, so it does not split the surface. As long as the nail and its tip are right for the wood surface, you don’t need to do anything else.
- Pinch the nail tip and place it carefully where it is supposed to be driven – The nail tip being in the right spot ensures that the nail head will be in the right spot eventually. If you hold the nail by the head right away, you might make an angular placement.
- Place position the head so it is perfectly over the top – If the head is not exactly atop the nail tip from above, the nail is slanted. In some instances, you’ll need to hammer at an angle. But in the absence of scenarios like pocket holes, you need to place the nailhead right above the surface. More importantly, the center of the hammer head should be at the center of the nail head. Even distribution of force is required to avoid slants initially and nail-bending later.
- Place the hammer flat over the nail head – This is crucial because many starting woodworkers get it wrong. You don’t start with your hand-wound all the way back. The hammerhead starts on the nail and is then taken back. The pulling motion is the secret to precision.
- Pull the hammer back with your elbow in place – When you pull the hammer back, don’t make the mistake of using your entire arm. Your arm should move mostly from the elbow so that precise contact can be made upon bringing it back. If you move from the shoulder, you’ll have more force behind your hammer, but the head will not hit exactly where it should be on the nail.
- Pull the wrist back a little to gear up the hammer even more – When you pull back the hammer, sticking to just the movement just from your forearm can be restrictive. Using your wrist as a point of winding is a must. This is where a bulk of the force will be generated. Once the nail is anchored in, you can be slightly loose with the elbow rigidity but avoid it as much as possible, at least initially.
- Keep your eye on the nail head – Often, novice woodworkers make the mistake of looking at the hammerhead. This is because the head can deal a lot of damage if it comes down on one’s fingers. But looking at the head will just make you nervous. More importantly, it will make you imprecise.
- Bring the hammer down on the nail – Bring the hammer down while you keep an eye on the nail head. If you’re just moving your forearm, the chances of hitting anything but the nail are slim. Still, it is advisable to keep the acceleration/speed low, at least in the beginning.
- Gradually increase hammer acceleration with each hit – Each time you hit the nail with your hammer, it will get driven into the wood, and the precision burden will be slightly lower. Eventually, you can speed up the hammering when your finger is nowhere near the nail head.
| Recommended Finishing Nails | Where To Buy? |
|---|---|
| The Hillman Group 532584 Finish Nails 3D, 1-1/4-Inch, 90-Pack | AMAZON |
| Mr. Pen- Nail Assortment Kit | AMAZON |
| Coceca 200 Pack Hardware Nails | AMAZON |
Final Thoughts – Why Finishing Nails Keep Bending
Finishing Nails keep bending because of imprecise hammering or tough wood. Hammering the nail perfectly is quite difficult with a small nailhead so getting a finish nailer is crucial. But if you find it difficult to hammer average nails without bending them, follow the steps covered above.
-
Why Finishing Nails Keep Bending? (Best Ways To Stop Them)
Finishing nails are sleek and nearly headless. They look great when appropriately fastened to a surface. Their functional utility is undeniable, but the difficulty in driving them is undeniable as well. I recently experienced this when I was fixing plywood back onto a cabinet. The struggle is real! Finishing nails keep bending because of 1…


2 responses to “Why Finishing Nails Keep Bending? (Best Ways To Stop Them)”
[…] In line with this, you may want to check my article about why finishing nails keep bending. […]
[…] backing on a bookshelf, a perfectly accepted nail for this could be 1.6 inches (40mm). Now, this is way longer than 3 times the backing thickness although this is fine as you should really only be con… being too short. not too […]